Classic UI testing
As mobile developers, we spend most of our time creating new impressive screens for our apps and when we are not, we are changing the ones that we already created. This is why we need a way to verify that we are not breaking what it was perfectly working before. In order to do so, we can create UI tests to easily verify that specific components are (or are not) being displayed in the screen. We can also access the properties of those views and see if they are in the correct state: labels have their text correctly set, buttons are enabled/disabled and so on.
With XCode 7 these sort of tests are easier to implement by using the new testing recorder tool. It is as easy as pressing the record button, doing some interaction within our app and adding the verifications afterward. However, there are some serious problems with this approach, the first and most important one being that our app lifecycle is entirely out of our control. We will often find ourselves having to set some sort of global variable to configure the state of the app as we want and then start interacting with the app (we will see how to address this problem with KIF). The second issue is that with these sort of tests it's really hard to verify what's the color of a label, or the position of every view in the screen or even the font we are using for our buttons. If we want a more fine-grained verification of the elements on the screen then we have to use another tool: screenshot testing.
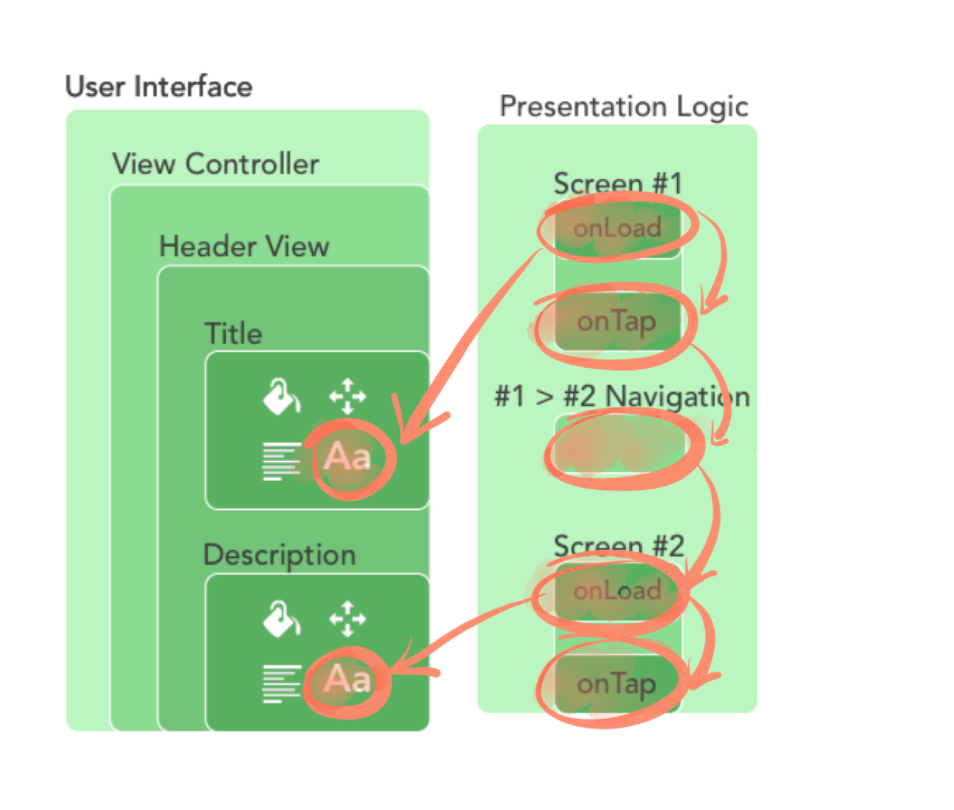
Classic UI testing focuses on specific views and interactions:

Screenshot testing
Keep in mind that screenshot testing is nothing but another tool and as such, it will work better in some scenarios while we won't find it that useful in others. Specifically, this sort of tests are meant to be used in our UI and they work by taking a picture of the device screen and comparing it with a reference image. Yes, is that simple. Where do we find those reference images, you are asking? We have two options here, we can create them by just running the test with a specific flag set to true so that they are recorded from the app itself or, even better, we can ask our designer to help us out with it so that we can automatically validate that the design is the one we are aiming for.
No matter which way we go, once we have our reference image, any visible change in the screen we are testing will make the test fail, be it a single pixel with a different color or a view that has been displaced. This might make you believe that maintaining screenshot tests is an exhausting task but nothing further from the truth. If you change your UI on purpose you will be able to see how does it look in different models and scenarios really fast (way faster than doing those checks manually, especially if we are using some sort of DI as we will see later) and whenever we are happy with the changes we will only have to run the failing tests one more time with the recording flag enabled to update our tests for future validations.
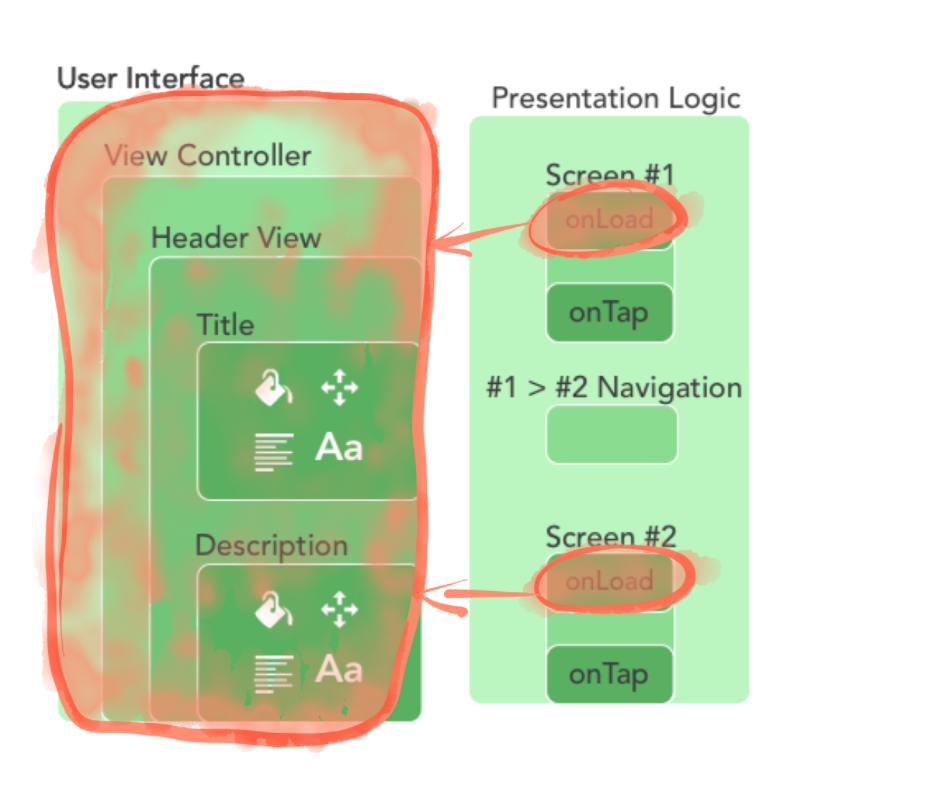
Screenshot is all about a perfect UI, leaving interactions aside:

What's better, classic UI testing or screenshot testing? To me, we can't say which one is better but rather which one is better suited for a specific screen. Imagine we have a minimalistic login screen, being such a critical part of our app, we are probably more interested in testing all the possible interactions: What happens when the email doesn't comply with the format? What's the error message we are showing when the password is incorrect? Is the user redirected to this screen when logging out? Is the login button disabled when the user hasn't filled any text field? Those checks are more naturally expressed in the classic approach, where we are more interested in verifying some views properties and interactions than the pixel-by-pixel comparison. On the other hand, a screen with a lot of small details like the description of an item or the profile of a user is more suited for screenshot testing because there are a lot of components in the screen and we want to make sure everything is looking good.
There is another difference between the two that we haven't mentioned yet and it's the number of tests needed to test the same screen. In general, we will find ourselves writing way less screenshot tests than UI tests, basically because with the former we will be trying to verify the state of things as they are presented. That means checking things like what are we showing when there are no elements or when the data is being loaded, while, in the latter, we are trying to capture transitions and interactions which, in general, are way more than possible states in our app screens.
KIF
Remember we said that classic UI testing had two main problems? One of them was that we, as developers, don't have the control of the application lifecycle and end up doing some nasty hacks to prepare the application so that we can see what happens in controlled situations... while the app is running.
KIF is a library to write UI tests with a standard XCTest target. That means we have full control on when we start the application and not only that! We can fully configure the state of the application before running any test. In order to achieve that, we have to obviously have a way to inject test doubles, prepare our databases and so, if you still don't know how to do those things here is one of the best blogposts on the matter (even though it's for Android, the same concepts apply for iOS). Besides that, KIF works by referencing views by their accessibility label so we will need to initialize them in all the views we want to check or interact with.
We already commented that KIF needs to be ran in a regular Unit Test target. As you may know, the app is started in a simulator even for those kind of tests and we will take advantage of that to start manipulating the key window and start our application in our own way. In a normal KIF test we will create the view controller under test and replace the root view controller with ours to then perform actions and verifications on it. This is how a normal KIF test looks like:
class MyTest: XCTestCase {
    func testSomethingWithKIF() {
        // Prepare application scenario
        DIContainer.myDataSource = stubDataSource

        // Start view controller under test
        UIApplication.shared.keyWindow?.rootViewController = DIContainer.myViewController
        tester().waitForAnimationsToFinish()

        // Perform some actions in the current screen
        tester().tapView(withAccessibilityLabel: "My Button")

        // Verify the state of the application after the actions
        tester().waitForView(withAccessibilityLabel: "Interaction success view")
    }
}
Just a quick clarification about this snippet. The DIContainer is just a class that knows how to initialize classes and we are just using it to replace the data source instance with our own stub so that we can return any values we want. Besides, here tester is nothing but a method that returns an instance of the main KIF class, that is used to perform interactions on the screen. We normally have it declared in an XCTestCase extension and it is defined as:
extension XCTestCase {
    func tester(file: String = #file, _ line: Int = #line) -> KIFUITestActor {
        return KIFUITestActor(inFile: file, atLine: line, delegate: self)
    }
}
There are a lot of methods to perform tappings, swapping gestures and to verify the presence or absence of views. The possibilities are endless and the library is pretty neat, if you want to take a look to a more in-depth usage of it, you can check our KataSuperHeroesIOS project.
FBSnapshotTestCase
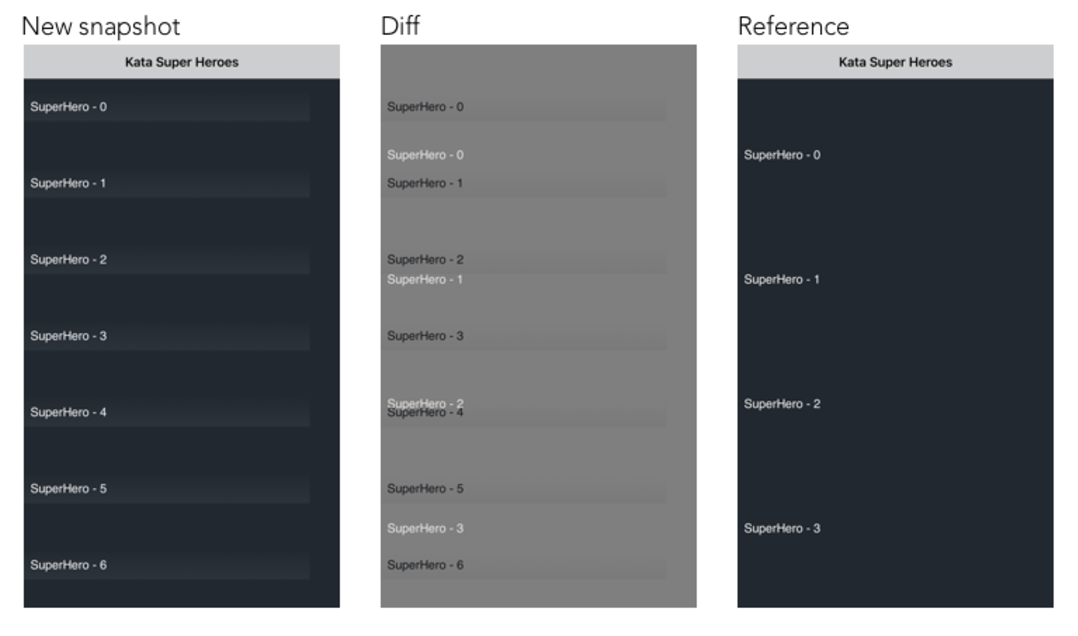
What about screenshot testing? Well, Facebook released a library called FBSnapshotTestCase a while ago and is, for the moment, the only realistic way to start creating your screenshot tests in iOS. With this library we will be able not only to test entire view controllers but also our custom views in isolation. It also offers a flag to be able to record our screens directly from our tests and a diff view that highlights the differences between our reference image and the tested one (if there is any). In order to create our screenshot tests we are required to use a Unit Test target (just as with KIF). Additionally, our tests will have to subclass from FBSnapshotTestCase instead of XCTestCase. In order to compare the screenshot of your view we will only need to create a FBSnapshotVerifyView and that's all.
Here is very simple example of how to use FBSnapshotTestCase:
class MyTest: FBSnapshotTestCase {
    func testSomethingWithScreenshotTesting() {
        // Prepare application scenario
        DIContainer.myDataSource = stubDataSource

        // Start view controller under test
        let vc = DIContainer.myViewController

        // Compare the view controller with the reference image
        FBSnapshotVerifyView(vc.view)
    }
}
If you need to create a reference image for your test you will need to set the recordMode property of FBSnapshotTestCase to true. By doing so, creating a FBSnapshotVerifyView instance will produce an image instead of doing a comparison. Once you have your reference image you'll only need to remove the recordMode line. There are a lot of options to choose in which folder the recorded screenshots will be stored or where to store the result of failing tests with its corresponding diff images. There are also options to differentiate between devices and their size classes. If you want to see a real project using it you can check our KataScreenshotIOS project.
Here we were trying to change the height of every cell but look at the weird gradient effect that appeared!

Going a step further
These two tools are awesome by their own and I highly recommend you to start using at least one of them in your apps, if you still haven't. However, in Karumi, we are always looking for more ways to create even better applications and we know tests are one of the best tools to let us achieve that goal. We soon found that there was an intersection between these two approaches: there were screens where both, the design and the interactions, were important. What about that listing of the best items in the store? What about the cool onboarding process our users will see when first opening the app? We want to make sure that those screens are perfect in every sense. This is where we can mix both approaches to get the most of our tests.
The good thing about mixing these two tools is that they are naturally thought to be used together! If we already have our KIF and screenshot tests in our application we won't need anything else to make them work. This is a very simple example of how a mixed test looks like:
class MyTest: FBSnapshotTestCase {
    func testSomethingWithKIFAndScreenshotTesting() {
        // Prepare application scenario - Same as before!
        DIContainer.myDataSource = stubDataSource

        // Start view controller under test
        UIApplication.shared.keyWindow?.rootViewController = DIContainer.myViewController
        tester().waitForAnimationsToFinish()

        // Perform some actions in the current screen
        tester().tapView(withAccessibilityLabel: "My Button")

        // Compare the view controller with the reference image
        FBSnapshotVerifyView(UIApplication.shared.keyWindow!.rootViewController.view)
    }
}
We start just as with a regular KIF test, preparing the scenario, creating the view controller and presenting it in the key window. Then we interact with it and right in the end we verify the whole view, that means, we take a screenshot of the whole screen and compare it with our reference image. Note: See how we are comparing the key window view controller in case we have performed a navigation to another screen.
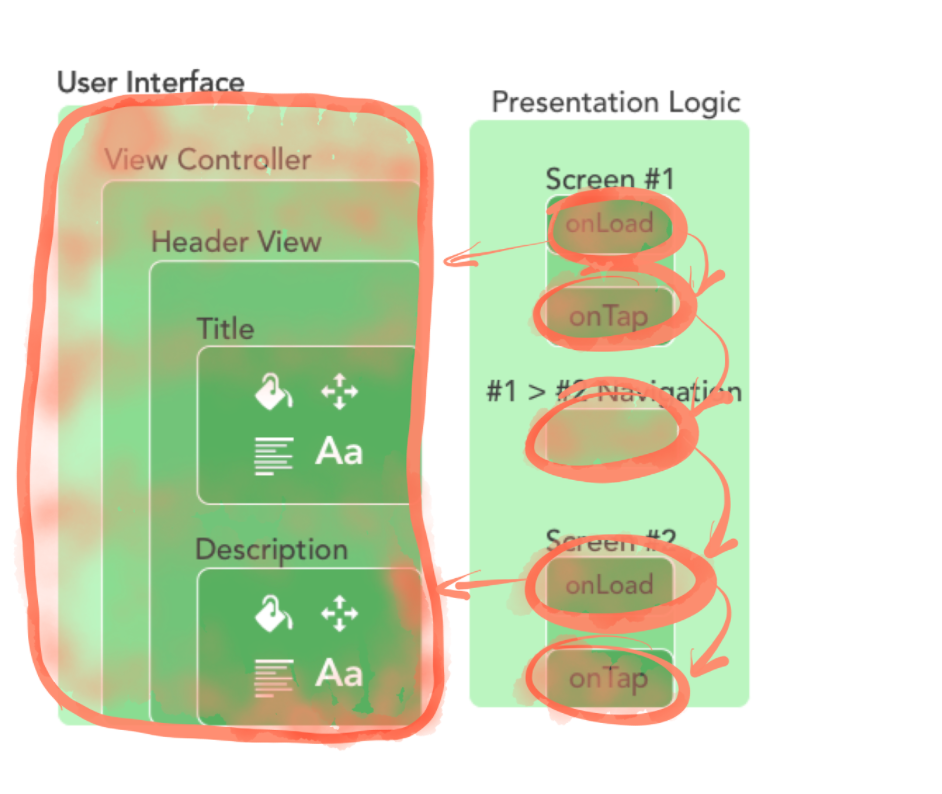
By combining both techniques we are able to exercise both, interactions and the whole UI:

The only thing to consider when doing these type of tests is that we should be very careful of how much code are we exercising in a single test. If we cover too many classes we will have a hard time trying to find why our tests are failing for the simple reason that we will have to analyze and understand much more code than with a more isolated test.
One last thing, this post is but a small example of what we cover with a lot of detail in our training so if you want to learn more about how these techniques work and how to use them in your real-world apps, just get in touch!