Introduction
As you may already know we are big supporters of the Kotlin programming language. From the very moment Google announced it was going to officially supported, we decided to spend some time learning and mastering it. We fell in love with it from the very beginning, from the expressiveness of its type system to the support for higher-order functions, it was great to rediscover Android development with such a powerful tool.
We like to think that was only the beginning and we've been watching closely the most recent updates coming from the JetBrains team. One of the most exciting news was the Kotlin team pushing forward to get Kotlin multiplatform working. That meant that besides being able to run Kotlin in Android apps, we can now write iOS apps, backend and frontend web with our favorite language!

We decided to further investigate and create an app for the two leading platforms, iOS, and Android, using Kotlin multiplatform. It’s still an ongoing effort, and there are many things we want to try and implement, but in the meantime, we want to tell you the things we found in the way.
Model
Kotlin multiplatform projects are usually divided into several modules. There will be one for every single target where we want to build our software, in our case, one for iOS and one for Android. We create another module to reuse code in both platforms, the shared or common module. The way multiplatform build works is by creating an artifact of the shared module -for every target- to later consume it from the different targets.

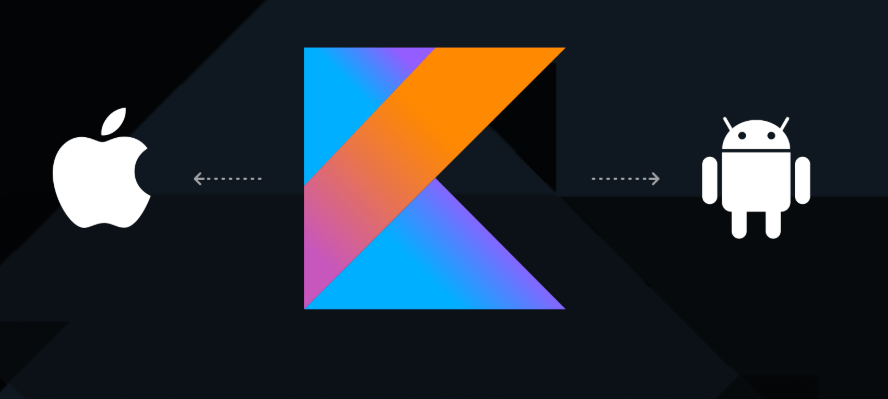
That means that Kotlin will generate both, a jar file and a framework file, from the same code for the final projects to consume it. The dashed section of the graphic above shows what we want to achieve. Even though Kotlin multiplatform is meant to be used also in Backend and Web, we will keep those out of the scope of our little experiment.
To configure a multiplatform project and all its dependencies we need first to create a new Gradle module to create the shared module.
shared/build.gradle
kotlin {
    targets {
        fromPreset(presets.jvm, "jvm")

        fromPreset(presets.iosX64, "ios_x86_64")
        fromPreset(presets.iosArm64, "ios_arm64")
        configure([ios_x86_64, ios_arm64]) {
            compilations.main.outputKinds("FRAMEWORK")
        }
    }

    sourceSets {
        commonMain {
            dependencies {
                implementation "org.jetbrains.kotlin:kotlin-stdlib"
            }
        }
        jvmMain {
            dependencies {
                implementation "org.jetbrains.kotlin:kotlin-stdlib:$kotlin_version"
            }
        }
        iosMain {
            dependencies {
            }
        }
        configure([ios_x86_64Main, ios_arm64Main]) {
            dependsOn iosMain
        }
    }
}

configurations {
    compileClasspath
}
We can see a lot of iOS configuration we will later review. Then we can define the Android project configuration and tell Gradle to add a dependency to the shared module.
androidApp/build.gradle.kts
android {
    buildToolsVersion = "28.0.3"
    compileSdkVersion(28)
    defaultConfig {
        minSdkVersion(21)
        targetSdkVersion(28)
        multiDexEnabled = true
        versionCode = 1
        testInstrumentationRunner = "android.support.test.runner.AndroidJUnitRunner"
    }
    buildTypes {
        getByName("release") {
            isMinifyEnabled = false
            proguardFiles(getDefaultProguardFile("proguard-android.txt"), "proguard-rules.pro")
        }
    }

    sourceSets {
        getByName("main").java.srcDirs("src/main/kotlin")
    }
}

dependencies {
    implementation("com.android.support.constraint:constraint-layout:1.1.3")
    implementation("com.android.support.constraint:constraint-layout:1.1.3")
    implementation("com.android.support:appcompat-v7:28.0.0")
    implementation("com.android.support:recyclerview-v7:28.0.0")
    implementation(kotlin("stdlib-jdk7", KotlinCompilerVersion.VERSION))
    implementation(project(":shared"))
}
Finally, we must configure the iOS project. This is the hardest step in the process because iOS works with its own build toolset. The trick here is to create a new Gradle task to generate a framework artifact. One important thing to keep in mind is that we need to create the artifact for different architectures, x86_64 for the simulator, and arm64 for real devices.
shared/build.gradle
task packForXCode(type: Sync) {
    final File frameworkDir = new File(buildDir, "xcode-frameworks")

    final String configuration = project.findProperty("CONFIGURATION")?.toUpperCase() ?: "DEBUG"
    final String arch = project.findProperty("ARCHS") ?: "x86_64"

    dependsOn kotlin.targets."ios_${arch}".compilations.main.linkTaskName("FRAMEWORK", configuration)

    from { kotlin.targets."ios_${arch}".compilations.main.getBinary("FRAMEWORK", configuration).parentFile }
    into frameworkDir
}

tasks.build.dependsOn packForXCode
We can now configure an XCode build phase to compile the shared module calling the new Gradle task and include the generated framework into the project.
cd ${SRCROOT}/..
./gradlew :shared:packForXCode \
  -PCONFIGURATION=${CONFIGURATION} \
  -PARCHS=${ARCHS}
Running the most basic checks
Once the project was up and running for both platforms, we wanted to invest in quality. We started configuring SwiftLint in the iOS project by adding a Podfile with the dependency:
platform :ios, "11.4"

target "Multiplatform app" do
  use_frameworks!
  pod "SwiftLint"
end
For Android, we went for our usual tools, ktlint, and detekt. Adding them is easy as the Android project is already built with the very same tools we use in our day to day for these projects.
shared/build.gradle
apply plugin: "io.gitlab.arturbosch.detekt"
apply plugin: "org.jlleitschuh.gradle.ktlint"

ktlint {
    version = "0.30.0"
    verbose = true
    android = false
    outputToConsole = true
    reporters = [ReporterType.PLAIN, ReporterType.CHECKSTYLE]
    filter {
        exclude("**/generated/**")
        include("**/kotlin/**")
    }
}

detekt {
    toolVersion = "1.0.0-RC14"
    input = files("src/main/kotlin")
    filters = ".*/resources/.*,.*/build/.*"
}

check.dependsOn ktlintCheck
check.dependsOn "detekt"
CI
The most important thing after setting some automatic checks in our project is to run them from time to time. We use Bitrise, and from the very beginning, we opted for using two different projects, one for each platform. In this way, we can configure the stack for each independently and run tests for both in parallel!
For Android, we are running all unit tests and lint checks. For iOS, we tried our best to do the same, but we are still finding some problems trying to find a stack supporting modern versions of Gradle and XCode.
Farewell
We are still working hard on solving some of the issues we are finding, like fixing our CI for iOS builds or making the most of our architecture to reuse as much code as possible. We promise this won’t be our last post so subscribe now to our newsletter and don’t miss anything.